I have been using Linux Mint desktops recently, and I find these easy to use. The only part I dislike about them is the date in the calendar applet in the task bar. This should fix it:
%A %d/%m/%Y %l:%M %p
This will make the date time look like this:
Wednesday 25/09/2013 2:16 PM
Alternatively, I also like the look of:
%A %d.%m.%Y %l:%M %p
This will make the date time look like this:
Wednesday 25.09.2013 2:16 PM
Showing posts with label Open Source. Show all posts
Showing posts with label Open Source. Show all posts
Wednesday, 25 September 2013


Saturday, 21 April 2012
No more N900 - now onto Android
This week I sadly said goodbye to the Nokia N900. The N900 came out in 2009, and offered so much promise as to what a truly free open sourced phone could offer, but Nokia managed it to failure.
I got my N900 after I was introduced to it by Ax - back in 2010. He showed me his N900 with all the great features:
Regardless of their decisions, I stuck with the Nokia N900. I even purchased a second unit when my initial unit's micro USB port started to malfunction. KittyKat also had a N900, but made the jump to an Android phone (the Sony Ericsson Xperia X10) after she accidentally dropped the phone, and then ran over it. Little did she know she was paving the way for myself.
My second unit's micro USB port started to malfunction again, and I knew this was leading to an untimely end for the unit. It must have been a weak point of the phone, as I found out recently that Ax's N900 went down the same path. Ax is now using an Android phone as well.
What makes Android interesting is the fact it is also a Linux based phone. Unfortunately it does not have the initial freedom in-built to it like the N900 does, as the system is more locked down, but it does have the potential to be "root'ed". Therefore, it is goodbye to the N900 and hello to the Sony Ericsson Xperia pro. Fortunately, it has a slider keyboard, that is similar to the N900, the form is somewhat less clunky than the N900, and it has a 8.1 Megapixel camera.
In the first few days of using this new device has been interesting. I am still getting use to the new keyboard, and the new layout of the desktops, but otherwise it has made a good replacement.

I have already noticed there has been more applications written for the Android system than the Maemo system. This is evident in the Google Play site - the Android's market site. Another observation I have made is that Android multi-tasking is not as good as I have witnessed on the N900 - with the Android phone only really being able to background 6 applications. Other than that I am pleased with my new device, and if I do anything exceptional with it, I will write about it on this site.
I got my N900 after I was introduced to it by Ax - back in 2010. He showed me his N900 with all the great features:
- Keyboard slider design
- 5 Megapixel camera
- Linux (Maemo) as its Operating System
- No tedious technique to "root" the device
- Command line available
Regardless of their decisions, I stuck with the Nokia N900. I even purchased a second unit when my initial unit's micro USB port started to malfunction. KittyKat also had a N900, but made the jump to an Android phone (the Sony Ericsson Xperia X10) after she accidentally dropped the phone, and then ran over it. Little did she know she was paving the way for myself.
My second unit's micro USB port started to malfunction again, and I knew this was leading to an untimely end for the unit. It must have been a weak point of the phone, as I found out recently that Ax's N900 went down the same path. Ax is now using an Android phone as well.
What makes Android interesting is the fact it is also a Linux based phone. Unfortunately it does not have the initial freedom in-built to it like the N900 does, as the system is more locked down, but it does have the potential to be "root'ed". Therefore, it is goodbye to the N900 and hello to the Sony Ericsson Xperia pro. Fortunately, it has a slider keyboard, that is similar to the N900, the form is somewhat less clunky than the N900, and it has a 8.1 Megapixel camera.
In the first few days of using this new device has been interesting. I am still getting use to the new keyboard, and the new layout of the desktops, but otherwise it has made a good replacement.

I have already noticed there has been more applications written for the Android system than the Maemo system. This is evident in the Google Play site - the Android's market site. Another observation I have made is that Android multi-tasking is not as good as I have witnessed on the N900 - with the Android phone only really being able to background 6 applications. Other than that I am pleased with my new device, and if I do anything exceptional with it, I will write about it on this site.
Friday, 10 February 2012
Upper and lower case in vim
I use vim for most of my text editing, especially with it comes to configuration and text files on UNIX / Linux machines, and there are times where I need to convert the entire file to uppercase or to lowercase. I find these two commands useful (when in command mode of vim):
:%s/[A-Z]/\L&/g
converts all uppercase characters to lowercase,
:%s/[a-z]/\U&/g
converts all lowercase characters to uppercase.
You could always toggle case characters using "~" as well.
:%s/[A-Z]/\L&/g
converts all uppercase characters to lowercase,
:%s/[a-z]/\U&/g
converts all lowercase characters to uppercase.
You could always toggle case characters using "~" as well.
Sunday, 9 October 2011
Checking disk space on a UNIX / Linux machine
I have been looking for an all in one script that I can use to check on disk space on a UNIX / Linux machine, and if it past a certain percentage, email out a message to an email address informing about the result. I searched the web, and found a page called "Monitor UNIX / Linux Server Disk Space with Shell Script".
The code from that page looked good, but did not work properly on the Solaris machine I was trying it on - possibly due to some weird configurations in the command line shell. I made some modifications to the script, and hopefully have made it generically enough so it can be run on any UNIX / Linux system. The code is:
#!/usr/bin/sh
############################################################
# disk_test.sh
############################################################
# http://riconthego.blogspot.com/
############################################################
# This script is check disk space on a machine, and email
# out to a list of people if any file systems are on 90+% ############################################################
df -k|awk '{ print $5 " " $6 }' | while read output; do
usedPercentage=`echo $output | awk '{ print $1}' | cut -d'%' -f1 `
driveMount=`echo $output | awk '{ print $2 }' `
if [ $usedPercentage -gt 89 ]; then
echo "Running out of disk space \"$driveMount ($usedPercentage%)\" on `hostname` as of `date`" | mailx -s "Alert: Partition on `hostname` is at $usedPercentage%" someone@somewhere.com
fi
done
In the script, change the someone@somewhere.com argument passed into the mailx command to the email address that is the recipient of the information. Copy and paste the above code into a file called disk_test.sh, and then in the directory you saved the file in, type in the following command (without the "$" at the start):
$ chmod u+x disk_test.sh
This will change the permissions of the file allowing it to be executed as a script. Execute the script by typing the following command:
$ ./disk_test.sh
If everything has worked, you should not see any returned strings or characters to the console. If any of the partitions on the system meet the criteria in the test, a separate email should be sent for each mount that exceeds the threshold. Lastly, you should set up a periodic cron job, to automatically run the job on the filesystem. Depending on your requirements, you may want to run this script anywhere from once a week to once an hour.
The code from that page looked good, but did not work properly on the Solaris machine I was trying it on - possibly due to some weird configurations in the command line shell. I made some modifications to the script, and hopefully have made it generically enough so it can be run on any UNIX / Linux system. The code is:
#!/usr/bin/sh
############################################################
# disk_test.sh
############################################################
# http://riconthego.blogspot.com/
############################################################
# This script is check disk space on a machine, and email
# out to a list of people if any file systems are on 90+% ############################################################
df -k|awk '{ print $5 " " $6 }' | while read output; do
usedPercentage=`echo $output | awk '{ print $1}' | cut -d'%' -f1 `
driveMount=`echo $output | awk '{ print $2 }' `
if [ $usedPercentage -gt 89 ]; then
echo "Running out of disk space \"$driveMount ($usedPercentage%)\" on `hostname` as of `date`" | mailx -s "Alert: Partition on `hostname` is at $usedPercentage%" someone@somewhere.com
fi
done
In the script, change the someone@somewhere.com argument passed into the mailx command to the email address that is the recipient of the information. Copy and paste the above code into a file called disk_test.sh, and then in the directory you saved the file in, type in the following command (without the "$" at the start):
$ chmod u+x disk_test.sh
This will change the permissions of the file allowing it to be executed as a script. Execute the script by typing the following command:
$ ./disk_test.sh
If everything has worked, you should not see any returned strings or characters to the console. If any of the partitions on the system meet the criteria in the test, a separate email should be sent for each mount that exceeds the threshold. Lastly, you should set up a periodic cron job, to automatically run the job on the filesystem. Depending on your requirements, you may want to run this script anywhere from once a week to once an hour.
Friday, 7 October 2011
Setting up cron
Setting up recurring tasks in a Unix-like / Linux environment is done via a program / mechanism called cron. You edit it (usually) using vi, and you put in variables of when you are supposed to run jobs - similar to a scheduler. The order of those fields is something I always seem to forget, so here they are (to remind me to populate the top of the cron files):
# Minute Hour Day of Month Month Day of Week Command
# (0-59) (0-23) (1-31) (1-12 or Jan-Dec) (0-6 or Sun-Sat)
As an example:
0 2 12 * 0,6 /usr/bin/find /stuff
Putting those comments at the top of every cron file should be enough for others to figure out what is being done. To display cron jobs, type (without the "$"):
$ crontab -l
To edit cron jobs, type:
$ crontab -e
Remember to use vi commands when editing. The Gentoo Linux vi page is a really good start, or you can just go directly to the vi "cheat sheet".
# Minute Hour Day of Month Month Day of Week Command
# (0-59) (0-23) (1-31) (1-12 or Jan-Dec) (0-6 or Sun-Sat)
As an example:
0 2 12 * 0,6 /usr/bin/find /stuff
Putting those comments at the top of every cron file should be enough for others to figure out what is being done. To display cron jobs, type (without the "$"):
$ crontab -l
To edit cron jobs, type:
$ crontab -e
Remember to use vi commands when editing. The Gentoo Linux vi page is a really good start, or you can just go directly to the vi "cheat sheet".

Monday, 26 September 2011
Microsoft is stifling your freedoms (again!)
This article was originally sent out on the Linux Users of Victoria (LUV) mailing list by Luke. After emailing Luke, he has release the below (with some of my alterations) as public domain:
It as part of the Windows 8 OEM scheme Microsoft requires the OEM's to lock down the computer to only run Windows 8 or other "authorized" OS'es via a signature system for "security" reasons.
Put simply, Microsoft as part of their OEM system require all new computers shipping with Windows 8 to use secure signing keys to prevent "unauthorized software" from running on the computer. This will prevent all free software operating systems from running on the computers that come with OEM by default.
So, we need YOU to stand up for Linux in Australia (and other countries)!
Simply follow these easy steps:
Here is the reference letter:
To ACCC,
I have recently learned that any new computer or laptop that ships with the upcoming Windows 8 Operating System will not be able to run any other Operating System. Microsoft's new UEFI Secure Boot system prevents 'unauthorized software' from running on any new computer sold with Windows 8. Making a system that ships with only Microsoft Windows not being able to boot a copy of Linux or any other operating system. I wish to use Linux on future computers, and this will not allow me to use Linux at all. Microsoft is engaging in seriously anti-competitive behavior by forcing the lockout of all competitors - see: http://www.itwire.com/opinion-and-analysis/open-sauce/49889-will-windows-8-succeed-in-locking-out-gnulinux
Not only will Microsoft kick out Linux off the computers, they will prevent 'upgrading' of windows versions: creating forced obsolescence. I am disgusted, is Microsoft legally allowed to do this? Microsoft has been slowly becoming more anti-competitive: computing used to be about choice, having the ability to choose the Operating System. Now Microsoft want to have complete control.
Regards,
[insert your name here]
Do something (now) about protecting your freedoms! And if you want to read more, try the originating opinion in itwire.
It as part of the Windows 8 OEM scheme Microsoft requires the OEM's to lock down the computer to only run Windows 8 or other "authorized" OS'es via a signature system for "security" reasons.
Put simply, Microsoft as part of their OEM system require all new computers shipping with Windows 8 to use secure signing keys to prevent "unauthorized software" from running on the computer. This will prevent all free software operating systems from running on the computers that come with OEM by default.
So, we need YOU to stand up for Linux in Australia (and other countries)!
Simply follow these easy steps:
- Click this link: here
- Fill out your concerns (find a reference letter below that you are free to copy / use).
- Submit with Personal Information (this is a real complaint, and the ACCC requires this information to possibly verify it is legitimate).
- Tell your friends to do the same.
- (optional) Forward this to your favorite Linux Mailing List.
- (optional) Phone the ACCC on 1300 302 502.
Here is the reference letter:
To ACCC,
I have recently learned that any new computer or laptop that ships with the upcoming Windows 8 Operating System will not be able to run any other Operating System. Microsoft's new UEFI Secure Boot system prevents 'unauthorized software' from running on any new computer sold with Windows 8. Making a system that ships with only Microsoft Windows not being able to boot a copy of Linux or any other operating system. I wish to use Linux on future computers, and this will not allow me to use Linux at all. Microsoft is engaging in seriously anti-competitive behavior by forcing the lockout of all competitors - see: http://www.itwire.com/opinion-and-analysis/open-sauce/49889-will-windows-8-succeed-in-locking-out-gnulinux
Not only will Microsoft kick out Linux off the computers, they will prevent 'upgrading' of windows versions: creating forced obsolescence. I am disgusted, is Microsoft legally allowed to do this? Microsoft has been slowly becoming more anti-competitive: computing used to be about choice, having the ability to choose the Operating System. Now Microsoft want to have complete control.
Regards,
[insert your name here]
Do something (now) about protecting your freedoms! And if you want to read more, try the originating opinion in itwire.
Monday, 6 June 2011
Over-engineering and sales in IT
I see so much over-engineering in my work while I work in the IT field. People have decided on products based on sales people coming in, showing a fantastical presentation, and then get sold on a product that will meet their needs (with the promise of having enough features to make it "future-proof"). In some instances, this may work. In many it fails.
In times like this, I reflect on an article which was written back in 2005 to address allegations that open source cannot compete with proprietary enterprise ready applications (usually the ones that are over-engineered) - Ryan Tomayko's article: IBM Poopheads: "LAMP Users Need to Grow Up".
I suggest that all decision makers in all organizations, regardless where you are on the corporate ladder, has a read of the article and draws their own conclusions. Have a read of the attached comments, and feel free to voice your opinions either there or on this blog.
In times like this, I reflect on an article which was written back in 2005 to address allegations that open source cannot compete with proprietary enterprise ready applications (usually the ones that are over-engineered) - Ryan Tomayko's article: IBM Poopheads: "LAMP Users Need to Grow Up".
I suggest that all decision makers in all organizations, regardless where you are on the corporate ladder, has a read of the article and draws their own conclusions. Have a read of the attached comments, and feel free to voice your opinions either there or on this blog.
Friday, 20 May 2011
Piping programs in shell
When I started to write this thread of articles on shell scripting, I did not know where it would lead me. I just started writing to try and cover what I knew about scripting, and how I have applied it. During this, I have written about:
The next bit I want to cover is about the toy block like structure of this type of language. You can build programs on top of other programs, and then "pipe" their output from one to another. Piping (also known as the verticle bar - "|" ) is a way of chaining output from one program in as the input for another program. Here is the shell script:
$ cat new.sh
#!/usr/bin/sh
echo This is a find on the test directory:
find test/ -print
echo ""
echo This is the same find, being passed through to grep to only find stuff ending with txt
find test/ -print | grep txt$
The first line defines this as a shell script. The second line prints the words "This is a find on the test directory" to the screen. The third line runs the find program on the test directory, and outputs the contents to the screen. The forth line line prints a blank line. The fifth line prints the line "This is the same find, being passed through to grep to only find stuff ending with txt". The sixth line is similar tot he third line, but before outputting the data to the screen, passes it via the grep filter (by the pipe character) to only print out lines that end with txt. I saved the file as new.sh, and running it produces:
$ ./new.sh
This is a find on the test directory:
test/
test/CheckThis.pl
test/servers.txt
test/CheckThat.pl
test/CheckSomethingElse.pl
test/web_pages.txt
This is the same find, being passed through to grep to only find stuff ending with txt
test/servers.txt
test/web_pages.txt
As a side note, while this script is straight forward, it introduces two new programs - being find and grep. Find, as its name suggests, finds files on a filesystem (it behaves differently on a Windows system). Grep is different. It is a filtering tool based on regular expressions. A regular expressions is a way to match strings. I could write an entire book on how to master regular expressions - there is so many combinations and permutations on how to write them. If you are interested in doing more with regular expressions, have a look at the Mastering Regular Expressions site.
The next bit I want to cover is about the toy block like structure of this type of language. You can build programs on top of other programs, and then "pipe" their output from one to another. Piping (also known as the verticle bar - "|" ) is a way of chaining output from one program in as the input for another program. Here is the shell script:
$ cat new.sh
#!/usr/bin/sh
echo This is a find on the test directory:
find test/ -print
echo ""
echo This is the same find, being passed through to grep to only find stuff ending with txt
find test/ -print | grep txt$
The first line defines this as a shell script. The second line prints the words "This is a find on the test directory" to the screen. The third line runs the find program on the test directory, and outputs the contents to the screen. The forth line line prints a blank line. The fifth line prints the line "This is the same find, being passed through to grep to only find stuff ending with txt". The sixth line is similar tot he third line, but before outputting the data to the screen, passes it via the grep filter (by the pipe character) to only print out lines that end with txt. I saved the file as new.sh, and running it produces:
$ ./new.sh
This is a find on the test directory:
test/
test/CheckThis.pl
test/servers.txt
test/CheckThat.pl
test/CheckSomethingElse.pl
test/web_pages.txt
This is the same find, being passed through to grep to only find stuff ending with txt
test/servers.txt
test/web_pages.txt
As a side note, while this script is straight forward, it introduces two new programs - being find and grep. Find, as its name suggests, finds files on a filesystem (it behaves differently on a Windows system). Grep is different. It is a filtering tool based on regular expressions. A regular expressions is a way to match strings. I could write an entire book on how to master regular expressions - there is so many combinations and permutations on how to write them. If you are interested in doing more with regular expressions, have a look at the Mastering Regular Expressions site.
Wednesday, 11 May 2011
Conditional scripting
When you break programming down, regardless what language or syntax it is written or developed in, the basis of a piece of code is how it handles a condition.
What happens when you have something? How do you handle it? What do you do with it?
The absolute basic conditional statement in shell scripting is the "if" statement. The basics of the if is that "if the conditions are met, then do something". To be fancier, you can also add "else". Here is an example:
#!/usr/bin/sh
variable1=Hello;
variable2=Goodbye;
echo "Let's start!";
if [ "$variable1" = "$variable2" ]; then
echo "The salutations are the same!";
else
echo "The salutations are not the same!";
fi
variable2=Hello;
echo "";
echo "Let's try again!";
if [ "$variable1" = "$variable2" ]; then
echo "The salutations are the same!";
else
echo "The salutations are not the same!";
fi
This simple script sets up 2 variables, and the compares them. In the second paragraph, it changes the second variable to be the same as the first variable, and runs the same if statement test on them again. The output looks like:
$ ./test.sh
Let's start!
The salutations are not the same!
Let's try again!
The salutations are the same!
While not very exciting, you can do many different types of data. Keep in mind that comparing text is different from comparing data. More comparison tests can be found here.
Lastly, I would like to mention that you can put a shell script into a type of "debug" mode where it will output more verbose information while it is running. This is by changing the first line of the script from:
#!/usr/bin/sh
to
#!/usr/bin/sh -x
Now the output looks like:
$ ./test.sh
variable1=Hello
variable2=Goodbye
+ echo Let's start!
Let's start!
+ [ Hello = Goodbye ]
+ echo The salutations are not the same!
The salutations are not the same!
variable2=Hello
+ echo
+ echo Let's try again!
Let's try again!
+ [ Hello = Hello ]
+ echo The salutations are the same!
The salutations are the same!
Good luck with your scripting, and I welcome any comments or queries.
What happens when you have something? How do you handle it? What do you do with it?
The absolute basic conditional statement in shell scripting is the "if" statement. The basics of the if is that "if the conditions are met, then do something". To be fancier, you can also add "else". Here is an example:
#!/usr/bin/sh
variable1=Hello;
variable2=Goodbye;
echo "Let's start!";
if [ "$variable1" = "$variable2" ]; then
echo "The salutations are the same!";
else
echo "The salutations are not the same!";
fi
variable2=Hello;
echo "";
echo "Let's try again!";
if [ "$variable1" = "$variable2" ]; then
echo "The salutations are the same!";
else
echo "The salutations are not the same!";
fi
This simple script sets up 2 variables, and the compares them. In the second paragraph, it changes the second variable to be the same as the first variable, and runs the same if statement test on them again. The output looks like:
$ ./test.sh
Let's start!
The salutations are not the same!
Let's try again!
The salutations are the same!
While not very exciting, you can do many different types of data. Keep in mind that comparing text is different from comparing data. More comparison tests can be found here.
Lastly, I would like to mention that you can put a shell script into a type of "debug" mode where it will output more verbose information while it is running. This is by changing the first line of the script from:
#!/usr/bin/sh
to
#!/usr/bin/sh -x
Now the output looks like:
$ ./test.sh
variable1=Hello
variable2=Goodbye
+ echo Let's start!
Let's start!
+ [ Hello = Goodbye ]
+ echo The salutations are not the same!
The salutations are not the same!
variable2=Hello
+ echo
+ echo Let's try again!
Let's try again!
+ [ Hello = Hello ]
+ echo The salutations are the same!
The salutations are the same!
Good luck with your scripting, and I welcome any comments or queries.
Tuesday, 3 May 2011
Basic variable creation in shell
In my last article on basic shell scripting, I did the universal hello world program. This time around, I will discuss making variables.
A variable is a symbolic name for information. You can call a variable nearly anything in unix shell scripting. There are some exceptions though. Here is the simple program outlining variables:
#!/usr/bin/sh
salutation=Hi;
name=Fred;
echo $salutation $name;
echo "";
echo salutation name;
The first line describes this program as a shell script. The second line assigns the value of "Hi" to the variable of salutation. The third line assigned the value of "Fred" to the variable of name. The forth line outputs the two variable values. This is done by using the "$" in front of the variable name. The fifth line prints out a blank line. The sixth line is only for comparison of what the fourth line would have looked like if it did not have the "$". I have saved the contents of the file to a file called "test.sh" and made it executable. The output is:
$ ./test.sh
Hi Fred
salutation name
That is as easy as variables can get. You can store text and letters in variables, as well as strings. With some clever delimiting, you can also turn these variables into mini lists - similar to arrays in other more advanced forms of programming.
I will attempt to write up how to do some basic comparisons in my next article on scripting. I am also welcome to suggestions via the comments of this post.
A variable is a symbolic name for information. You can call a variable nearly anything in unix shell scripting. There are some exceptions though. Here is the simple program outlining variables:
#!/usr/bin/sh
salutation=Hi;
name=Fred;
echo $salutation $name;
echo "";
echo salutation name;
The first line describes this program as a shell script. The second line assigns the value of "Hi" to the variable of salutation. The third line assigned the value of "Fred" to the variable of name. The forth line outputs the two variable values. This is done by using the "$" in front of the variable name. The fifth line prints out a blank line. The sixth line is only for comparison of what the fourth line would have looked like if it did not have the "$". I have saved the contents of the file to a file called "test.sh" and made it executable. The output is:
$ ./test.sh
Hi Fred
salutation name
That is as easy as variables can get. You can store text and letters in variables, as well as strings. With some clever delimiting, you can also turn these variables into mini lists - similar to arrays in other more advanced forms of programming.
I will attempt to write up how to do some basic comparisons in my next article on scripting. I am also welcome to suggestions via the comments of this post.
Sunday, 6 February 2011
A colourful command prompt in bash
A command prompt is very important in a UNIX / Linux environment. The best thing about it, is that it is fully customizable. The one I find most useful at the moment is this:
export PS1="\[\033[1;34m\][ \[\033[1;32m\]\\u\[\033[1;34m\] @ \[\033[1;32m\]\\h\[\033[1;33m\] \\w \[\033[1;34m\]] \! \$\[\033[0m\] "
That line can be executed from a command line, or added to the bottom of the .bashrc file that is each user's home directory. If you add it to the .bashrc file, then you will need to exit your session, and log back into the machine. The results are to colourize the command line with the username, the hostname, the location of the current directory, and the number of the command about to be executed.
The results are:
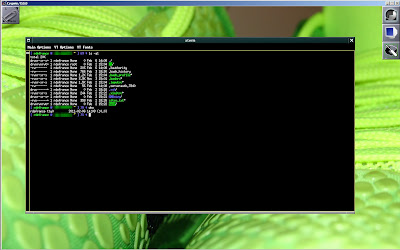
or:
[ ric_man @ mymachine ~ ] 75 $
In the case of a user that has elevated privileges, you may be interested in change the colours of the command prompt - like making it all red if the user is the administrator, or the box is a production machine. Refer to a this page with a list of bash colours for more ideas.
export PS1="\[\033[1;34m\][ \[\033[1;32m\]\\u\[\033[1;34m\] @ \[\033[1;32m\]\\h\[\033[1;33m\] \\w \[\033[1;34m\]] \! \$\[\033[0m\] "
That line can be executed from a command line, or added to the bottom of the .bashrc file that is each user's home directory. If you add it to the .bashrc file, then you will need to exit your session, and log back into the machine. The results are to colourize the command line with the username, the hostname, the location of the current directory, and the number of the command about to be executed.
The results are:

or:
[ ric_man @ mymachine ~ ] 75 $
In the case of a user that has elevated privileges, you may be interested in change the colours of the command prompt - like making it all red if the user is the administrator, or the box is a production machine. Refer to a this page with a list of bash colours for more ideas.
Friday, 28 January 2011
Removing comments and blank lines out of files
Sometimes I have the need to read configuration files, but I do not want to see the comments in them, or the blank lines - I just want to see the information that is relevant. If you have ever had to deal with a "default" configuration file for the Apache Web Server, or the Squid Proxy Server, then you know what I mean. The default files will usually have big sections of comments, to be used as examples or reminders of features that you can switch on or off.
I find this next line useful in removing comments and blank lines:
grep -v ^# file_name|grep -v '^[[:space:]]*$'
For example, if the file is called web.txt and result of running the line over the file is:
[ ric_man @ mymachine ~/test ] 506 $ cat web.txt
### Section 1: Global Environment
#
# The directives in this section affect the overall operation of Apache,
# such as the number of concurrent requests it can handle or where it
# can find its configuration files.
#
#
# ServerType is either inetd, or standalone. Inetd mode is only supported on
# Unix platforms.
#
ServerType standalone
#
# ServerRoot: The top of the directory tree under which the server's
# configuration, error, and log files are kept.
#
# NOTE! If you intend to place this on an NFS (or otherwise network)
# mounted filesystem then please read the LockFile documentation
# (available at);
# you will save yourself a lot of trouble.
#
# Do NOT add a slash at the end of the directory path.
#
ServerRoot "/var/www"
#
# The LockFile directive sets the path to the lockfile used when Apache
# is compiled with either USE_FCNTL_SERIALIZED_ACCEPT or
# USE_FLOCK_SERIALIZED_ACCEPT. This directive should normally be left at
# its default value. The main reason for changing it is if the logs
# directory is NFS mounted, since the lockfile MUST BE STORED ON A LOCAL
# DISK. The PID of the main server process is automatically appended to
# the filename.
#
#LockFile logs/accept.lock
[ ric_man @ mymachine ~/test ] 507 $ grep -v ^# web.txt|grep -v '^[[:space:]]*$'
ServerType standalone
ServerRoot "/var/www"
Just in case you are confused with what I have done above - I have outputted the contents of the file first, and then run the command over it. This is to illustrate the amount of removing that the line does.
I find this next line useful in removing comments and blank lines:
grep -v ^# file_name|grep -v '^[[:space:]]*$'
For example, if the file is called web.txt and result of running the line over the file is:
[ ric_man @ mymachine ~/test ] 506 $ cat web.txt
### Section 1: Global Environment
#
# The directives in this section affect the overall operation of Apache,
# such as the number of concurrent requests it can handle or where it
# can find its configuration files.
#
#
# ServerType is either inetd, or standalone. Inetd mode is only supported on
# Unix platforms.
#
ServerType standalone
#
# ServerRoot: The top of the directory tree under which the server's
# configuration, error, and log files are kept.
#
# NOTE! If you intend to place this on an NFS (or otherwise network)
# mounted filesystem then please read the LockFile documentation
# (available at
# you will save yourself a lot of trouble.
#
# Do NOT add a slash at the end of the directory path.
#
ServerRoot "/var/www"
#
# The LockFile directive sets the path to the lockfile used when Apache
# is compiled with either USE_FCNTL_SERIALIZED_ACCEPT or
# USE_FLOCK_SERIALIZED_ACCEPT. This directive should normally be left at
# its default value. The main reason for changing it is if the logs
# directory is NFS mounted, since the lockfile MUST BE STORED ON A LOCAL
# DISK. The PID of the main server process is automatically appended to
# the filename.
#
#LockFile logs/accept.lock
[ ric_man @ mymachine ~/test ] 507 $ grep -v ^# web.txt|grep -v '^[[:space:]]*$'
ServerType standalone
ServerRoot "/var/www"
Just in case you are confused with what I have done above - I have outputted the contents of the file first, and then run the command over it. This is to illustrate the amount of removing that the line does.
Thursday, 27 January 2011
Finding text within files recursively
Occasionally, I need to search for text strings within files within directories on a UNIX / Linux command line. I find that the following is able to assist me in finding the correct line:
find . -exec grep -i search_string {} /dev/null \;
Here is an example of it in action:
[ ric_man @ mymachine ~/test ] 521 $ ls -alR
.:
total 11K
drwxr-xr-x+ 1 ric_man None 0 2011-01-27 10:12 ./
drwxr-xr-x+ 1 ric_man None 0 2011-01-27 10:09 ../
-rwx------+ 1 ric_man None 1.2K 2011-01-17 15:03 OBS_bulk.txt*
-rwxr-xr-x 1 ric_man None 291 2011-01-17 15:41 convert.sh*
drwxr-xr-x+ 1 ric_man None 0 2011-01-27 10:11 dir1/
drwxr-xr-x+ 1 ric_man None 0 2011-01-27 10:12 dir2/
-rw-r--r-- 1 ric_man None 10 2011-01-27 10:12 fileA.txt
-rw-r--r-- 1 ric_man None 83 2010-12-23 13:55 input.txt
-rwxr-xr-x 1 ric_man None 1.1K 2010-12-23 14:03 runme.sh*
./dir1:
total 2.0K
drwxr-xr-x+ 1 ric_man None 0 2011-01-27 10:11 ./
drwxr-xr-x+ 1 ric_man None 0 2011-01-27 10:12 ../
-rw-r--r-- 1 ric_man None 39 2011-01-27 10:11 file1.txt
-rw-r--r-- 1 ric_man None 39 2011-01-27 10:11 file2.txt
./dir2:
total 1.0K
drwxr-xr-x+ 1 ric_man None 0 2011-01-27 10:12 ./
drwxr-xr-x+ 1 ric_man None 0 2011-01-27 10:12 ../
-rw-r--r-- 1 ric_man None 18 2011-01-27 10:12 fred.conf
[ ric_man @ mymachine ~/test ] 522 $ find . -exec grep -i snack {} /dev/null \;
./dir1/file1.txt:Here is the string to be found - snack
./dir1/file2.txt:Here is the string to be found - snack
./dir2/fred.conf:Snack found here!
./fileA.txt:Snack me!
In Microsoft Windows environments, I think there's a search facility, but it is slow, and sometimes inaccurate.
find . -exec grep -i search_string {} /dev/null \;
Here is an example of it in action:
[ ric_man @ mymachine ~/test ] 521 $ ls -alR
.:
total 11K
drwxr-xr-x+ 1 ric_man None 0 2011-01-27 10:12 ./
drwxr-xr-x+ 1 ric_man None 0 2011-01-27 10:09 ../
-rwx------+ 1 ric_man None 1.2K 2011-01-17 15:03 OBS_bulk.txt*
-rwxr-xr-x 1 ric_man None 291 2011-01-17 15:41 convert.sh*
drwxr-xr-x+ 1 ric_man None 0 2011-01-27 10:11 dir1/
drwxr-xr-x+ 1 ric_man None 0 2011-01-27 10:12 dir2/
-rw-r--r-- 1 ric_man None 10 2011-01-27 10:12 fileA.txt
-rw-r--r-- 1 ric_man None 83 2010-12-23 13:55 input.txt
-rwxr-xr-x 1 ric_man None 1.1K 2010-12-23 14:03 runme.sh*
./dir1:
total 2.0K
drwxr-xr-x+ 1 ric_man None 0 2011-01-27 10:11 ./
drwxr-xr-x+ 1 ric_man None 0 2011-01-27 10:12 ../
-rw-r--r-- 1 ric_man None 39 2011-01-27 10:11 file1.txt
-rw-r--r-- 1 ric_man None 39 2011-01-27 10:11 file2.txt
./dir2:
total 1.0K
drwxr-xr-x+ 1 ric_man None 0 2011-01-27 10:12 ./
drwxr-xr-x+ 1 ric_man None 0 2011-01-27 10:12 ../
-rw-r--r-- 1 ric_man None 18 2011-01-27 10:12 fred.conf
[ ric_man @ mymachine ~/test ] 522 $ find . -exec grep -i snack {} /dev/null \;
./dir1/file1.txt:Here is the string to be found - snack
./dir1/file2.txt:Here is the string to be found - snack
./dir2/fred.conf:Snack found here!
./fileA.txt:Snack me!
In Microsoft Windows environments, I think there's a search facility, but it is slow, and sometimes inaccurate.
Tuesday, 25 January 2011
Finding out users in groups
In a UNIX / Linux environment, it may be useful to determine who is in a group. The following line will determine who is in a group, and pull out their information based on the finger protocol:
for i in $(cat /etc/group|grep -i insert_group_name_here|cut -d ":" -f 4|sed 's/,/ /g'); do echo "################"; echo "";finger $i; echo"";done
This looks like:
$ for i in $(cat /etc/group|grep -i mygroup|cut -d ":" -f 4|sed 's/,/ /g'); do echo "################"; echo "";finger $i; echo"";done
################
Login name: smithjrr In real life: 6116
Site Info: A/E/John Smith
Directory: /home/smithjrr Shell: /usr/bin/ksh
No Plan.
################
Login name: mywasguy In real life: 6116
Site Info: C/K/L/Web App Server Admin
Directory: /home/mywasguy Shell: /usr/bin/ksh
No Plan.
################
Login name: ric In real life: 6116
Site Info: E/I/ric_man
Directory: /home/ric Shell: /usr/bin/ksh
On since Jan 25 11:17:22 on pts/0
No Plan.
Your results may vary depending on how the information is stored.
for i in $(cat /etc/group|grep -i insert_group_name_here|cut -d ":" -f 4|sed 's/,/ /g'); do echo "################"; echo "";finger $i; echo"";done
This looks like:
$ for i in $(cat /etc/group|grep -i mygroup|cut -d ":" -f 4|sed 's/,/ /g'); do echo "################"; echo "";finger $i; echo"";done
################
Login name: smithjrr In real life: 6116
Site Info: A/E/John Smith
Directory: /home/smithjrr Shell: /usr/bin/ksh
No Plan.
################
Login name: mywasguy In real life: 6116
Site Info: C/K/L/Web App Server Admin
Directory: /home/mywasguy Shell: /usr/bin/ksh
No Plan.
################
Login name: ric In real life: 6116
Site Info: E/I/ric_man
Directory: /home/ric Shell: /usr/bin/ksh
On since Jan 25 11:17:22 on pts/0
No Plan.
Your results may vary depending on how the information is stored.
Tuesday, 18 January 2011
Copying and renaming files in Linux / UNIX
I had a problem of multiple locations containing the same file names, but wanting to copy all those files into the one directory to back them up. The file structure looked something like this:
./somewhere/install1/conf/webserver1.conf
./somewhere/install1/conf/webserver2.conf
./somewhere/install1/conf/webserver3.conf
./somewhere/install1/conf/webserver4.conf
./somewhere/install2/conf/webserver1.conf
./somewhere/install2/conf/webserver2.conf
./somewhere/install2/conf/webserver3.conf
./somewhere/install2/conf/webserver4.conf
If I was to copy the files over into the same location, some of the files would overwrite files which had a similar name. So, with the following line, I manipulated the target filename to retain the original location of the file:
$ for i in $(find . -name webserver*.conf | grep -v backup | grep -v Trace | grep -v LocalConfig); do cp $i /tmp/mylocation/$(echo $i|sed 's/\//_/g'|sed 's/^\._//g'); done
The final result is:
/tmp/mylocation/somewhere_install1_conf_webserver1.conf
/tmp/mylocation/somewhere_install1_conf_webserver2.conf
/tmp/mylocation/somewhere_install1_conf_webserver3.conf
/tmp/mylocation/somewhere_install1_conf_webserver4.conf
/tmp/mylocation/somewhere_install2_conf_webserver1.conf
/tmp/mylocation/somewhere_install2_conf_webserver2.conf
/tmp/mylocation/somewhere_install2_conf_webserver3.conf
/tmp/mylocation/somewhere_install2_conf_webserver4.conf
While this could have been made into a script, I have not done it in a full script. Therefore it is not apart of the shell scripting tutorial series I was writing for Kitty Kat.
I have also noticed that a few people are reading this, and making suggestions to me via email. Please feel free to share your comments on this and all the articles on this blog, by using the comments link at the bottom of every blog posting.
./somewhere/install1/conf/webserver1.conf
./somewhere/install1/conf/webserver2.conf
./somewhere/install1/conf/webserver3.conf
./somewhere/install1/conf/webserver4.conf
./somewhere/install2/conf/webserver1.conf
./somewhere/install2/conf/webserver2.conf
./somewhere/install2/conf/webserver3.conf
./somewhere/install2/conf/webserver4.conf
If I was to copy the files over into the same location, some of the files would overwrite files which had a similar name. So, with the following line, I manipulated the target filename to retain the original location of the file:
$ for i in $(find . -name webserver*.conf | grep -v backup | grep -v Trace | grep -v LocalConfig); do cp $i /tmp/mylocation/$(echo $i|sed 's/\//_/g'|sed 's/^\._//g'); done
The final result is:
/tmp/mylocation/somewhere_install1_conf_webserver1.conf
/tmp/mylocation/somewhere_install1_conf_webserver2.conf
/tmp/mylocation/somewhere_install1_conf_webserver3.conf
/tmp/mylocation/somewhere_install1_conf_webserver4.conf
/tmp/mylocation/somewhere_install2_conf_webserver1.conf
/tmp/mylocation/somewhere_install2_conf_webserver2.conf
/tmp/mylocation/somewhere_install2_conf_webserver3.conf
/tmp/mylocation/somewhere_install2_conf_webserver4.conf
While this could have been made into a script, I have not done it in a full script. Therefore it is not apart of the shell scripting tutorial series I was writing for Kitty Kat.
I have also noticed that a few people are reading this, and making suggestions to me via email. Please feel free to share your comments on this and all the articles on this blog, by using the comments link at the bottom of every blog posting.
Friday, 14 January 2011
Basic shell scripting tutorial
Kitty Kat has asked me to teach her some basic shell scripting tips. She may be interested in writing her own scripts to automate functions or tasks on the Linux machine we both use. I thought that this was a good idea, but while I was giving her some pointers as what to do, I'd share it with anyone else who may be interested.
Therefore, I'll start with the universal "hello world" program. The first part is to determine if you have a shell to use, and if you can access the echo command. From you command line (assuming it is a "$"), type in the following (without the "$"):
$ which sh
$ which echo
The response from your system should look something like this:
$ which sh
/usr/bin/sh
$ which echo
/usr/bin/echo
Variations of the path are acceptable, but something like this means there is something wrong:
$ which echo
which: no echo in (/usr/local/bin:/usr/bin:/bin)
This means that either echo is not installed on your system, or that echo is not in the PATH that your command line interface is aware of. Assuming that everything is correct, open up a text editor that you are comfortable with, and (based on the information above), type in the following:
#!/usr/bin/sh
# Hello World Program
echo "Hello World!";
Save it as a file called "helloWorld.sh", and quit out of the editor. If your which commands returned different variables from the ones used in this example, adjust your helloWorld.sh script accordingly.
By default, most Linux systems do not make scripts automatically executable. To make it executable, type the following:
$ chmod u+x helloWorld.sh
To run the script, type the following:
$ ./helloWorld.sh
The output should be:
$ ./helloWorld.sh
Hello World!
In breaking down the simple script, the first line ("#!/usr/bin/sh") tells the command line that is is a shell script. Changing it would invoke different scripting engines (for example, "#!/usr/bin/perl" would mean the contents of the script should be a perl script). The next line is a comment line - and this is designated by the use of a hash symbol ("#") preceding the other text on the line. Comments are used to improve readability, but are totally optional. The third line is the line that displays the words.
I hope to expand this article into a few more that cover a few other things to do in the shell. Just look for the "Shell Scripting" tag I will use for this series of articles.
Therefore, I'll start with the universal "hello world" program. The first part is to determine if you have a shell to use, and if you can access the echo command. From you command line (assuming it is a "$"), type in the following (without the "$"):
$ which sh
$ which echo
The response from your system should look something like this:
$ which sh
/usr/bin/sh
$ which echo
/usr/bin/echo
Variations of the path are acceptable, but something like this means there is something wrong:
$ which echo
which: no echo in (/usr/local/bin:/usr/bin:/bin)
This means that either echo is not installed on your system, or that echo is not in the PATH that your command line interface is aware of. Assuming that everything is correct, open up a text editor that you are comfortable with, and (based on the information above), type in the following:
#!/usr/bin/sh
# Hello World Program
echo "Hello World!";
Save it as a file called "helloWorld.sh", and quit out of the editor. If your which commands returned different variables from the ones used in this example, adjust your helloWorld.sh script accordingly.
By default, most Linux systems do not make scripts automatically executable. To make it executable, type the following:
$ chmod u+x helloWorld.sh
To run the script, type the following:
$ ./helloWorld.sh
The output should be:
$ ./helloWorld.sh
Hello World!
In breaking down the simple script, the first line ("#!/usr/bin/sh") tells the command line that is is a shell script. Changing it would invoke different scripting engines (for example, "#!/usr/bin/perl" would mean the contents of the script should be a perl script). The next line is a comment line - and this is designated by the use of a hash symbol ("#") preceding the other text on the line. Comments are used to improve readability, but are totally optional. The third line is the line that displays the words.
I hope to expand this article into a few more that cover a few other things to do in the shell. Just look for the "Shell Scripting" tag I will use for this series of articles.
Monday, 6 December 2010
Moving from Gentoo to Ubuntu for a while
With much teasing or coaxing from Ax, I've installed Ubuntu Linux on my Toshiba P20, replacing the installation of Gentoo Linux on it. Have I stopped being a Gentoo User? No. I'm just on hold for the moment. My reasons for a temporary switch are:
With the installation of Ubuntu Linux, I have found that I was able to get most of the old applications I had on my Gentoo Linux installation installed. I much prefer the way Gentoo Linux handles the bash prompt, as well as how it has configured vim by default. I have also lost the ability to install Unreal Tournament 2004 with all the patches in one easy command. I have also noticed that playback of DVDs in Ubuntu's Movie Player (Totem) is choppy compared to playback in Gentoo's Totem. Using Xine in Ubuntu makes movies run smooth again. It was also a nice change to be able to just download programs and be up and running in a short amount of time. From memory, the installation process took around 40 minutes, whereas I believe the Gentoo installation process took around 4 hours - and that was just to get to a base system. Installation of OpenOffice.org from source code would take a few more hours, and even longer for X.org, Firefox, and other applications.
Saying all that, my plan for the future is to source another computer, and install Gentoo onto that, or more likely - Funtoo Linux. Funtoo Linux is the new "project" from Daniel Robbins, the original creator of Gentoo Linux. Since he created Gentoo Linux, he has moved onto other projects, and other employment opportunities, but has returned to creating a Linux distribution. With some of the current applications getting larger (I am thinking of OpenOffice.org and Firefox), it would be much appreciated to have a modern computer to be able to compile and handle these applications better.
I will update this blog when I have more news...
- Kitty Kat is now using the Toshiba P20, and would like a simpler Linux to use. I see her point in that I was used to using my Gentoo Linux with some applications being invoked from the command line. Up until then, she was using an old Toshiba Tecra A3X, which had Ubuntu installed on it. She was fine with using that.
- I spent a lot of time attempting to get Bluetooth working on the Toshiba P20, only to find after about 3 months of tinkering, I still did not manage to get it working. Since installing Ubuntu Linux on the Toshiba P20, it has manged to get Bluetooth working. Well done to the guys from Ubuntu in figuring it out.
- I spent some time getting Wi-Fi working on the Toshiba P20, and it came down to either installing GNOME's NetworkManager, or doing it manually. Since the machine is usually used from home, I only needed to put in one SSID, so I chose to code it in manually. With Ubuntu Linux now installed, I have the flexibility of just taking the Toshiba P20 with me to other locations, and it can find and configure other wireless points.
With the installation of Ubuntu Linux, I have found that I was able to get most of the old applications I had on my Gentoo Linux installation installed. I much prefer the way Gentoo Linux handles the bash prompt, as well as how it has configured vim by default. I have also lost the ability to install Unreal Tournament 2004 with all the patches in one easy command. I have also noticed that playback of DVDs in Ubuntu's Movie Player (Totem) is choppy compared to playback in Gentoo's Totem. Using Xine in Ubuntu makes movies run smooth again. It was also a nice change to be able to just download programs and be up and running in a short amount of time. From memory, the installation process took around 40 minutes, whereas I believe the Gentoo installation process took around 4 hours - and that was just to get to a base system. Installation of OpenOffice.org from source code would take a few more hours, and even longer for X.org, Firefox, and other applications.
Saying all that, my plan for the future is to source another computer, and install Gentoo onto that, or more likely - Funtoo Linux. Funtoo Linux is the new "project" from Daniel Robbins, the original creator of Gentoo Linux. Since he created Gentoo Linux, he has moved onto other projects, and other employment opportunities, but has returned to creating a Linux distribution. With some of the current applications getting larger (I am thinking of OpenOffice.org and Firefox), it would be much appreciated to have a modern computer to be able to compile and handle these applications better.
I will update this blog when I have more news...
Thursday, 25 November 2010
Quick find and replace in bash across multiple files
I'm always trying to find easier ways of doing things, and here is a way (in BASH) that allows me to find and replace a line of text (ie. a string) across multiple files much quicker than opening up each file, and doing it manually:
for i in $(grep "String1" *|cut -d ":" -f 1); do
sed "s/String1/String2/g" $i > $i.new;
rm $i;
mv $i.new $i;
done
for i in $(grep "String1" *|cut -d ":" -f 1); do
sed "s/String1/String2/g" $i > $i.new;
rm $i;
mv $i.new $i;
done
Tuesday, 16 November 2010
Perl (ugh - again!)
I first used Perl in 2001, and after around 6 months of using it, I decided I would not like to use it again. In 2007, after using Perl, I decided I would not like to use it again. In the early part of 2010, after using Perl, I decided I would not like to use it again. And now... well, you get the picture.
So here are some useful links I have found and use for Perl:
So here are some useful links I have found and use for Perl:
Saturday, 16 October 2010
Transforming pictures in Linux
I use GNU/Linux for most of my computing needs. This includes manipulating photos I upload to this blog. I could open each image one by one in GIMP, resize them, and then save them with the new file name - but that would be time consuming and monotonous. With the use of the Imagemagick command line tool set, and the Linux command line, I've found a way to script up the renaming and resizing of the images.

Here are the steps:
1. Transfer the images from your camera to the computer. Linux is very USB aware, and when I plug in my camera, it offers to either start an instance of a photo viewer, a visual file browser, or do nothing. I choose to open the visual file browser, so I can drag and drop the image files onto a directory / folder on my desktop. Here are those files: 2. Next is to open up a command line, and run some commands. Some of the commands are important, some can be ignored. I will start by going into the directory and checking if the files are there:
evilric@hawk:~/Desktop/fake_air_jordan_VIs$ ls
DSC05049.JPG DSC05056.JPG DSC05063.JPG DSC05070.JPG DSC05077.JPG
DSC05050.JPG DSC05057.JPG DSC05064.JPG DSC05071.JPG DSC05078.JPG
DSC05051.JPG DSC05058.JPG DSC05065.JPG DSC05072.JPG DSC05079.JPG
DSC05052.JPG DSC05059.JPG DSC05066.JPG DSC05073.JPG
DSC05053.JPG DSC05060.JPG DSC05067.JPG DSC05074.JPG
DSC05054.JPG DSC05061.JPG DSC05068.JPG DSC05075.JPG
DSC05055.JPG DSC05062.JPG DSC05069.JPG DSC05076.JPG
 2. Next is to open up a command line, and run some commands. Some of the commands are important, some can be ignored. I will start by going into the directory and checking if the files are there:
evilric@hawk:~/Desktop/fake_air_jordan_VIs$ ls
DSC05049.JPG DSC05056.JPG DSC05063.JPG DSC05070.JPG DSC05077.JPG
DSC05050.JPG DSC05057.JPG DSC05064.JPG DSC05071.JPG DSC05078.JPG
DSC05051.JPG DSC05058.JPG DSC05065.JPG DSC05072.JPG DSC05079.JPG
DSC05052.JPG DSC05059.JPG DSC05066.JPG DSC05073.JPG
DSC05053.JPG DSC05060.JPG DSC05067.JPG DSC05074.JPG
DSC05054.JPG DSC05061.JPG DSC05068.JPG DSC05075.JPG
DSC05055.JPG DSC05062.JPG DSC05069.JPG DSC05076.JPG
The command is "ls" to list the contents of the directory. It is optional. Keep in mind these are all the original sized images, directly from the camera, taken in 7 megapixels - 3072 x 2304. With limited space on servers, and limited bandwidth, the idea is to reduce them all to 1024 x 768 as well as renaming them to something more readable.
3. Check to see the space used by this directory:
evilric@hawk:~/Desktop/fake_air_jordan_VIs$ du -sh
81M .
The command is "du" with the "-sh" flags. It is optional. The output says that all the files consume 81 megabytes in storage.
4. Now run mini-script to convert the images and rename them at the same time:
evilric@hawk:~/Desktop/fake_air_jordan_VIs$ myCount=0;for i in $(ls); do echo "$i -> fake_air_jordan_VIs_$myCount.jpg"; convert $i -resize 1024x768 fake_air_jordan_VIs_$myCount.jpg; myCount=$[$myCount+1];done; for i in $(seq 0 9); do mv fake_air_jordan_VIs_$i.jpg fake_air_jordan_VIs_0$i.jpg; done
DSC05049.JPG -> fake_air_jordan_VIs_0.jpg
DSC05050.JPG -> fake_air_jordan_VIs_1.jpg
DSC05051.JPG -> fake_air_jordan_VIs_2.jpg
DSC05052.JPG -> fake_air_jordan_VIs_3.jpg
DSC05053.JPG -> fake_air_jordan_VIs_4.jpg
DSC05054.JPG -> fake_air_jordan_VIs_5.jpg
DSC05055.JPG -> fake_air_jordan_VIs_6.jpg
DSC05056.JPG -> fake_air_jordan_VIs_7.jpg
DSC05057.JPG -> fake_air_jordan_VIs_8.jpg
DSC05058.JPG -> fake_air_jordan_VIs_9.jpg
DSC05059.JPG -> fake_air_jordan_VIs_10.jpg
DSC05060.JPG -> fake_air_jordan_VIs_11.jpg
DSC05061.JPG -> fake_air_jordan_VIs_12.jpg
DSC05062.JPG -> fake_air_jordan_VIs_13.jpg
DSC05063.JPG -> fake_air_jordan_VIs_14.jpg
DSC05064.JPG -> fake_air_jordan_VIs_15.jpg
DSC05065.JPG -> fake_air_jordan_VIs_16.jpg
DSC05066.JPG -> fake_air_jordan_VIs_17.jpg
DSC05067.JPG -> fake_air_jordan_VIs_18.jpg
DSC05068.JPG -> fake_air_jordan_VIs_19.jpg
DSC05069.JPG -> fake_air_jordan_VIs_20.jpg
DSC05070.JPG -> fake_air_jordan_VIs_21.jpg
DSC05071.JPG -> fake_air_jordan_VIs_22.jpg
DSC05072.JPG -> fake_air_jordan_VIs_23.jpg
DSC05073.JPG -> fake_air_jordan_VIs_24.jpg
DSC05074.JPG -> fake_air_jordan_VIs_25.jpg
DSC05075.JPG -> fake_air_jordan_VIs_26.jpg
DSC05076.JPG -> fake_air_jordan_VIs_27.jpg
DSC05077.JPG -> fake_air_jordan_VIs_28.jpg
DSC05078.JPG -> fake_air_jordan_VIs_29.jpg
DSC05079.JPG -> fake_air_jordan_VIs_30.jpg
This command is the what does the conversion. I have written it all on one line, but I am sure you could have this in a nicely formatted script. I am being lazy here. The script resets the counter at 0, and for each item it finds in the directory, it will resize it, and rename it. The second loop in the line makes the first 10 files have an additional 0 in their file name. This is only to allow listing them in order, and does not affect the files at all. This step is NOT optional.
5. You now have the new files and the old files in the one directory. You can stop at this point, and just use the new files. Additionally you can check that the files have been transformed:
evilric@hawk:~/Desktop/fake_air_jordan_VIs$ ls -alh
total 93M
drwxr-xr-x 2 evilric evilric 4.0K 2010-10-16 01:06 .
drwxr-xr-x 14 evilric evilric 4.0K 2010-10-16 00:34 ..
-rwxr-xr-x 1 evilric evilric 2.9M 2010-10-12 11:31 DSC05049.JPG
-rwxr-xr-x 1 evilric evilric 2.7M 2010-10-12 11:31 DSC05050.JPG
-rwxr-xr-x 1 evilric evilric 2.9M 2010-10-12 11:32 DSC05051.JPG
-rwxr-xr-x 1 evilric evilric 2.7M 2010-10-12 11:32 DSC05052.JPG
-rwxr-xr-x 1 evilric evilric 2.9M 2010-10-12 11:33 DSC05053.JPG
-rwxr-xr-x 1 evilric evilric 3.0M 2010-10-12 11:33 DSC05054.JPG
-rwxr-xr-x 1 evilric evilric 2.6M 2010-10-12 11:34 DSC05055.JPG
-rwxr-xr-x 1 evilric evilric 2.7M 2010-10-12 11:34 DSC05056.JPG
-rwxr-xr-x 1 evilric evilric 2.3M 2010-10-12 11:35 DSC05057.JPG
-rwxr-xr-x 1 evilric evilric 2.4M 2010-10-12 11:35 DSC05058.JPG
-rwxr-xr-x 1 evilric evilric 2.6M 2010-10-12 11:35 DSC05059.JPG
-rwxr-xr-x 1 evilric evilric 3.2M 2010-10-12 11:36 DSC05060.JPG
-rwxr-xr-x 1 evilric evilric 2.7M 2010-10-12 11:36 DSC05061.JPG
-rwxr-xr-x 1 evilric evilric 2.6M 2010-10-12 11:37 DSC05062.JPG
-rwxr-xr-x 1 evilric evilric 2.8M 2010-10-12 11:37 DSC05063.JPG
-rwxr-xr-x 1 evilric evilric 3.3M 2010-10-12 11:38 DSC05064.JPG
-rwxr-xr-x 1 evilric evilric 3.2M 2010-10-12 11:38 DSC05065.JPG
-rwxr-xr-x 1 evilric evilric 2.0M 2010-10-12 11:38 DSC05066.JPG
-rwxr-xr-x 1 evilric evilric 2.3M 2010-10-12 11:39 DSC05067.JPG
-rwxr-xr-x 1 evilric evilric 2.1M 2010-10-12 11:39 DSC05068.JPG
-rwxr-xr-x 1 evilric evilric 2.0M 2010-10-12 11:39 DSC05069.JPG
-rwxr-xr-x 1 evilric evilric 2.1M 2010-10-12 11:39 DSC05070.JPG
-rwxr-xr-x 1 evilric evilric 2.6M 2010-10-12 11:40 DSC05071.JPG
-rwxr-xr-x 1 evilric evilric 2.4M 2010-10-12 11:40 DSC05072.JPG
-rwxr-xr-x 1 evilric evilric 2.4M 2010-10-12 11:40 DSC05073.JPG
-rwxr-xr-x 1 evilric evilric 2.3M 2010-10-12 11:40 DSC05074.JPG
-rwxr-xr-x 1 evilric evilric 2.7M 2010-10-12 11:41 DSC05075.JPG
-rwxr-xr-x 1 evilric evilric 3.0M 2010-10-12 11:41 DSC05076.JPG
-rwxr-xr-x 1 evilric evilric 2.9M 2010-10-12 11:42 DSC05077.JPG
-rwxr-xr-x 1 evilric evilric 2.5M 2010-10-12 11:42 DSC05078.JPG
-rwxr-xr-x 1 evilric evilric 3.3M 2010-10-12 11:44 DSC05079.JPG
-rw-r--r-- 1 evilric evilric 426K 2010-10-16 01:04 fake_air_jordan_VIs_00.jpg
-rw-r--r-- 1 evilric evilric 390K 2010-10-16 01:04 fake_air_jordan_VIs_01.jpg
-rw-r--r-- 1 evilric evilric 435K 2010-10-16 01:04 fake_air_jordan_VIs_02.jpg
-rw-r--r-- 1 evilric evilric 437K 2010-10-16 01:04 fake_air_jordan_VIs_03.jpg
-rw-r--r-- 1 evilric evilric 462K 2010-10-16 01:04 fake_air_jordan_VIs_04.jpg
-rw-r--r-- 1 evilric evilric 499K 2010-10-16 01:04 fake_air_jordan_VIs_05.jpg
-rw-r--r-- 1 evilric evilric 378K 2010-10-16 01:04 fake_air_jordan_VIs_06.jpg
-rw-r--r-- 1 evilric evilric 374K 2010-10-16 01:04 fake_air_jordan_VIs_07.jpg
-rw-r--r-- 1 evilric evilric 328K 2010-10-16 01:04 fake_air_jordan_VIs_08.jpg
-rw-r--r-- 1 evilric evilric 353K 2010-10-16 01:05 fake_air_jordan_VIs_09.jpg
-rw-r--r-- 1 evilric evilric 402K 2010-10-16 01:05 fake_air_jordan_VIs_10.jpg
-rw-r--r-- 1 evilric evilric 452K 2010-10-16 01:05 fake_air_jordan_VIs_11.jpg
-rw-r--r-- 1 evilric evilric 384K 2010-10-16 01:05 fake_air_jordan_VIs_12.jpg
-rw-r--r-- 1 evilric evilric 395K 2010-10-16 01:05 fake_air_jordan_VIs_13.jpg
-rw-r--r-- 1 evilric evilric 408K 2010-10-16 01:05 fake_air_jordan_VIs_14.jpg
-rw-r--r-- 1 evilric evilric 451K 2010-10-16 01:05 fake_air_jordan_VIs_15.jpg
-rw-r--r-- 1 evilric evilric 479K 2010-10-16 01:05 fake_air_jordan_VIs_16.jpg
-rw-r--r-- 1 evilric evilric 287K 2010-10-16 01:05 fake_air_jordan_VIs_17.jpg
-rw-r--r-- 1 evilric evilric 352K 2010-10-16 01:05 fake_air_jordan_VIs_18.jpg
-rw-r--r-- 1 evilric evilric 305K 2010-10-16 01:05 fake_air_jordan_VIs_19.jpg
-rw-r--r-- 1 evilric evilric 259K 2010-10-16 01:05 fake_air_jordan_VIs_20.jpg
-rw-r--r-- 1 evilric evilric 293K 2010-10-16 01:05 fake_air_jordan_VIs_21.jpg
-rw-r--r-- 1 evilric evilric 366K 2010-10-16 01:05 fake_air_jordan_VIs_22.jpg
-rw-r--r-- 1 evilric evilric 334K 2010-10-16 01:05 fake_air_jordan_VIs_23.jpg
-rw-r--r-- 1 evilric evilric 330K 2010-10-16 01:05 fake_air_jordan_VIs_24.jpg
-rw-r--r-- 1 evilric evilric 310K 2010-10-16 01:05 fake_air_jordan_VIs_25.jpg
-rw-r--r-- 1 evilric evilric 381K 2010-10-16 01:05 fake_air_jordan_VIs_26.jpg
-rw-r--r-- 1 evilric evilric 429K 2010-10-16 01:05 fake_air_jordan_VIs_27.jpg
-rw-r--r-- 1 evilric evilric 423K 2010-10-16 01:06 fake_air_jordan_VIs_28.jpg
-rw-r--r-- 1 evilric evilric 390K 2010-10-16 01:06 fake_air_jordan_VIs_29.jpg
-rw-r--r-- 1 evilric evilric 459K 2010-10-16 01:06 fake_air_jordan_VIs_30.jpg
As seen in the size listing, the new files are considerably smaller.
6. At this stage, I will delete the original files from the directory, and check the space used:
evilric@hawk:~/Desktop/fake_air_jordan_VIs$ rm DSC050*
evilric@hawk:~/Desktop/fake_air_jordan_VIs$ du -sh
12M .
The reduction in size has gone from 81 megabytes to 12 megabytes. The final result is not noticeable in the file browser:

Why do it like this? It is lazy, involves less keystrokes, and allows you step away for the computer for the 2 minutes (or so) it takes to transform the images. The alternative would be close to 10 to 15 minutes of manually opening images, clicking this and that, and then saving the result. If you have several hundred holiday pictures, you could run a similar script, and then process them all while you make and enjoy a coffee.
As mentioned on this blog page, you are more than welcome to copy the text, modify it, play with it, but if you pass it onto someone else, or publish it on your own web site / blog, then make a mention of me as the original inspiration.
Subscribe to:
Posts (Atom)